Are you wondering how to take high-quality, professional-looking photos with your iPhone? One simple trick is using the iPhone camera timer to capture DSLR-like shots. Whether you’re taking selfies, group photos, or night shots, using the timer can improve stability and composition. In this guide, we’ll explain how to set a timer on your iPhone camera and share some expert tips to enhance your photography.
Why Use the Timer on Your iPhone Camera?
Using a timer on your iPhone camera has multiple benefits, such as:
- Avoiding Shaky Photos: The timer allows you to take pictures without touching the phone, reducing camera shake.
- Perfect Group Shots: Capture group photos without leaving anyone out.
- Creative Photography: Enables you to experiment with long exposure, motion blur, and night shots.
- Hands-Free Selfies: No need to hold the phone while posing.
How to Set a Timer on iPhone Camera
Setting a timer on your iPhone camera is quick and easy. Follow these steps:
- Open the Camera App
- Unlock your iPhone and tap on the Camera app.
- Select Photo Mode
- Ensure that you are in Photo mode (or Portrait mode for a DSLR effect).
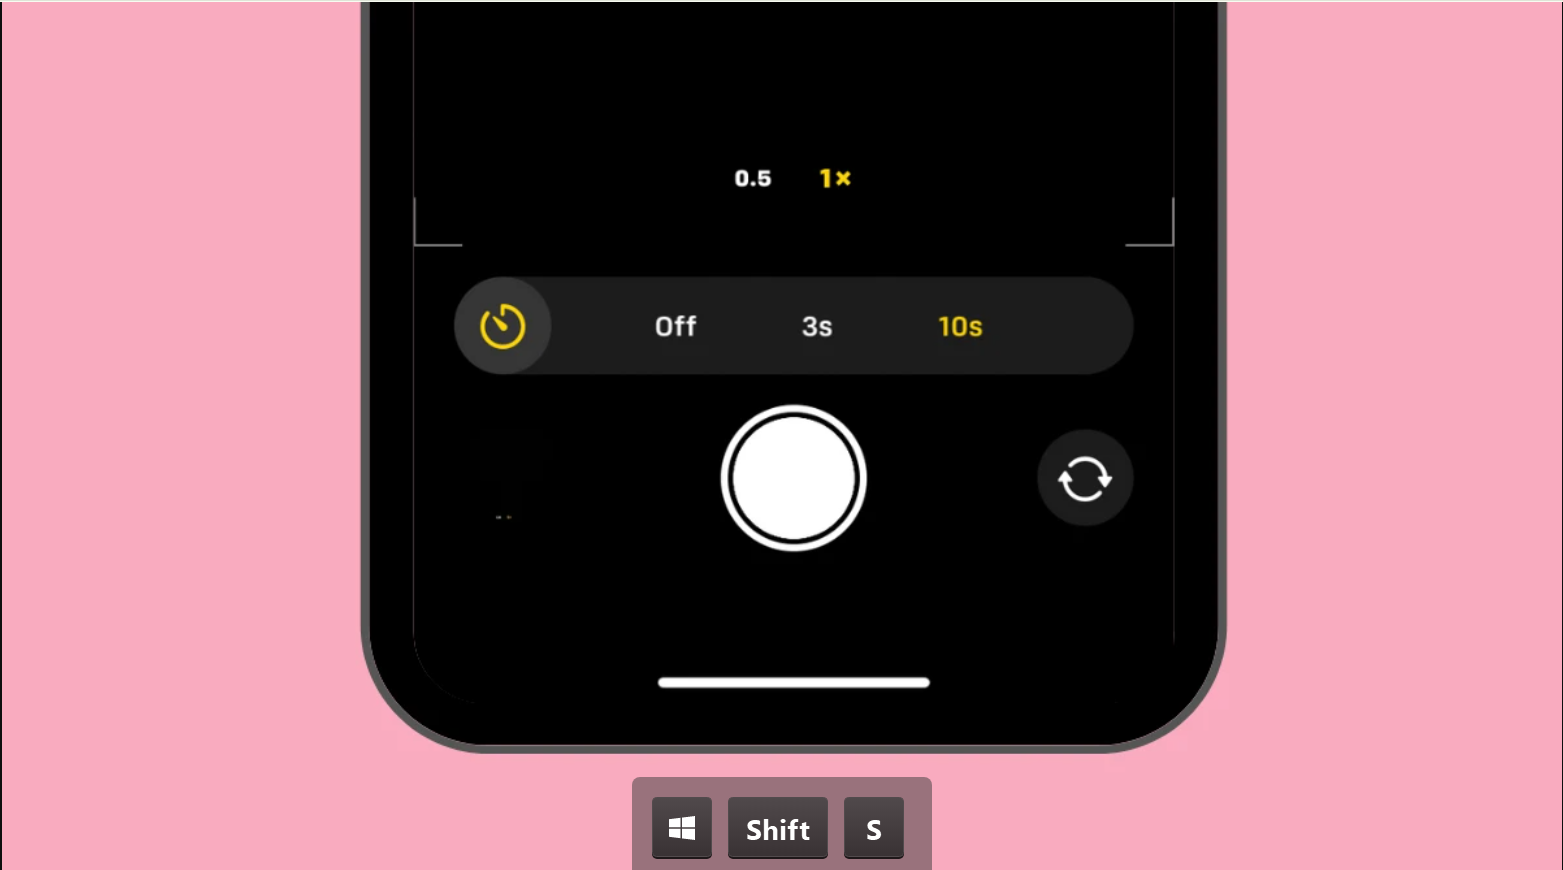
- Tap on the Timer Icon
- Look for the Timer icon (clock symbol) at the top of the screen.
- If you don’t see it, tap the ^ (caret) icon to reveal additional options.
- Choose a Timer Duration
- Select 3 seconds or 10 seconds, depending on your preference.
- Set Up Your Shot
- Place your iPhone on a stable surface or use a tripod.
- Frame your subject carefully.
- Press the Shutter Button
- Once you press the shutter button, the countdown will begin.
- Capture Your Photo
- After the timer ends, the camera will take a burst of images, allowing you to choose the best shot.
Pro Tips for DSLR-Like Photos with iPhone
To enhance your iPhone photography skills, follow these tips:
1. Use Portrait Mode
- Portrait mode blurs the background, creating a bokeh effect similar to a DSLR.
2. Adjust Focus and Exposure
- Tap on your subject to focus.
- Slide up or down to adjust brightness.
3. Use Gridlines for Better Composition
- Go to Settings > Camera > Grid and enable it.
- Follow the rule of thirds for balanced shots.
4. Take Advantage of Night Mode
- If shooting in low light, Night Mode automatically improves brightness and detail.
5. Use External Accessories
- A tripod and Bluetooth remote can help capture ultra-stable shots.
Best iPhone Camera Apps for Pro-Level Photography
While the default iPhone camera app is powerful, you can enhance your photography with third-party apps:
- Halide: Offers advanced manual controls.
- ProCamera: Provides DSLR-like features.
- VSCO: Great for professional filters and editing.
Final Thoughts
By using the iPhone camera timer and applying professional photography techniques, you can achieve stunning, DSLR-quality images. Whether you’re capturing selfies, nature shots, or group photos, this simple trick will elevate your photography skills. Start experimenting today and take your iPhone photography to the next level!
Related Keywords:
- How to set timer on iPhone camera
- iPhone photography tips
- DSLR-like photos on iPhone
- Best iPhone camera settings
- iPhone camera tricks
Let us know in the comments how the timer feature has improved your iPhone photography!
